Breeding and raising live mealworms is a simple process, but it is time-consuming and requires regular attention and care. Raising mealworms to have a consistent supply year-round saves a great deal of money versus purchasing multiple times per year from a local feed store or an online retailer. You are also more likely to have higher yield when the worms are homegrown.
Listed below are instructions on raising, breeding, and maintaining a colony of mealworms. You can purchase a Mealworm Breeder Kit that includes everything you need to kickstart your colony. If all goes well, you should have mealworms to use as feeders within about 3 months.

What You’ll Need
-
150+ Live Mealworms (we recommend 500+)
-
Breeder Box – approximately 14" x 8" x 5”
-
Mealworm Keeper (or any meal bedding)
-
Mealworm Chow & raw vegetables (for food)
-
Thirsty Cricket (and/or raw vegetables to provide moisture)
Starting Your Colony
Step 1: Obtain Your Mealworms
-
You can start with as few as 150 mealworms, but at least 500 is recommended.
-
The more mealworms you start with, the faster your colony will produce a steady supply.
-
Be cautious if purchasing superworms (Zophobas morio), as they are sometimes treated with insect growth hormones that make them sterile.
Step 2: Prepare the Breeder Box
-
Use a large, shallow, smooth-sided container (about the size of a shoebox or larger).
-
Plastic or glass is best—avoid wood or cardboard, as worms can chew through.
-
A clear container lets you monitor frass (waste).
-
Keep mealworms no more than 1 ½” deep to prevent overheating.
-
Always use a tight-fitting, ventilated lid to prevent infestations. Drill holes if needed for airflow.
-
If condensation forms inside the lid, add more ventilation.
Step 3: Add Bedding
-
Fill the container with 2–3” of Mealworm Keeper (or another fine “meal” substrate such as bran meal, cornmeal, or oatmeal).
-
Place your mealworms in the bedding.
Step 4: Provide Food & Moisture
-
Add about ½ cup of raw vegetables such as potato, carrot, apple, or banana peel.
-
Replace food every few days or when moldy.
-
Use Thirsty Cricket (gel water source) or moist foods to keep worms hydrated.
-
Too little moisture slows growth; too much can produce mold.
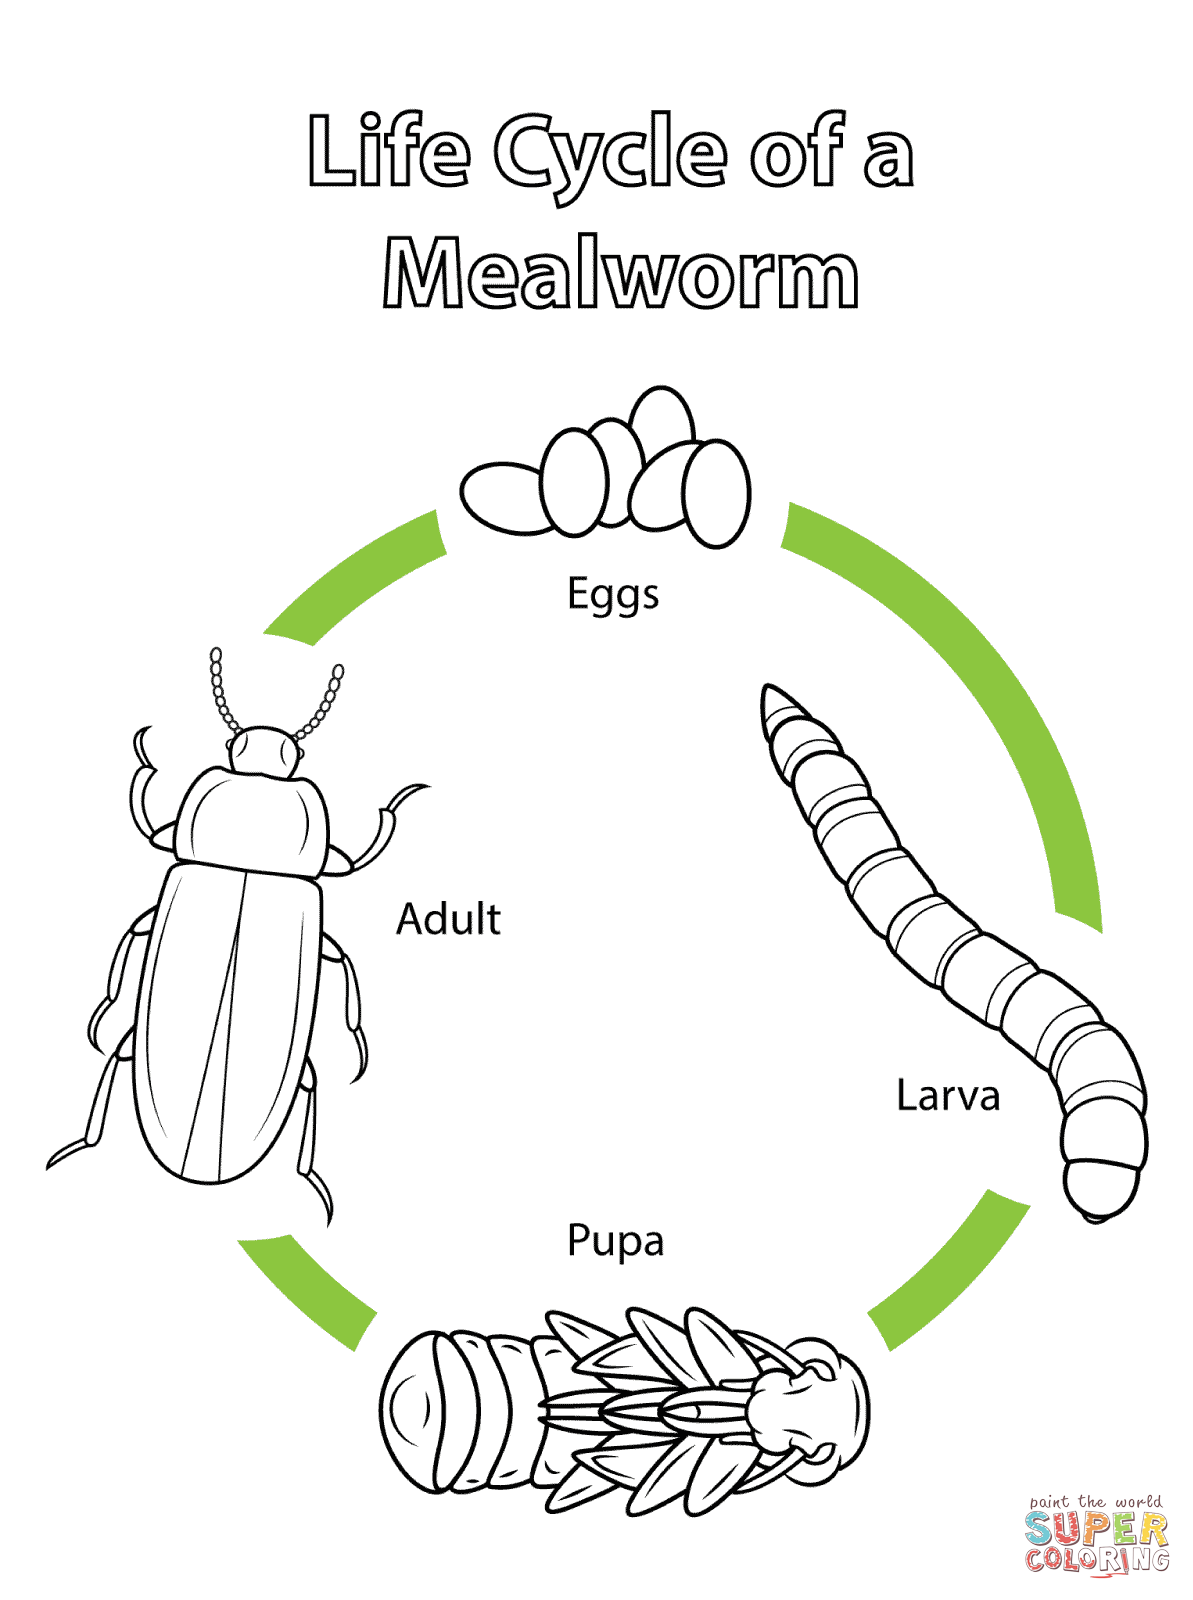
Growing & Life Cycle
-
Once prepared, leave the container undisturbed for several weeks.
-
Mealworms will eat, then pupate, then become beetles.
-
Adult beetles will lay eggs that hatch into new mealworms.
-
For best results:
-
Temperature: ~80ºF
-
Humidity: ~70%
-
Keep the container out of direct sunlight.
-
If using a heat lamp, add extra moisture sources (Thirsty Cricket, raw veggies, moist sponge).
-
-
Check regularly with a thermometer to prevent overheating.
Life Stages:
-
Larvae (mealworms): ~4–6 weeks
-
Pupae: 1–3 weeks
-
Adult beetles: Reproduce and lay eggs until the end of their lifespan
-
Eggs: Hatch in 1–4 weeks
⚠️ Important: Separate eggs and larvae from beetles—otherwise beetles may eat them. Remove dead mealworms and beetles promptly.
Maintaining Your Colony
-
Mealworms take 3+ months to complete their cycle.
-
As adults, beetles will reproduce, lay eggs, and die.
-
Check bins daily:
-
Regulate temperature
-
Replace food
-
Remove dead worms/beetles
-
Using a Two-Container System
-
After beetles appear, move them to a second Breeder Box with fresh bedding and vegetables.
-
This prevents beetles from eating the eggs and larvae.
-
The beetles will lay more eggs in the new container, continuing the cycle.
-
Tip: Use apple slices to attract beetles, then shake them into the second bin.
Harvesting
-
Once larvae are large enough, they can be fed to pets.
-
To store for later: keep mealworms in the refrigerator (4–8 weeks).
-
Any worms left in the container will continue their cycle into pupae and beetles.
-
Always cycle beetles into a second container for continuous production.
Cleaning
-
Once bedding is depleted or foul-smelling:
-
Remove larvae
-
Discard old bedding
-
Clean container thoroughly
-
Replace with fresh bedding and vegetables
-
-
Sift out any eggs if needed before cleaning.
Life Cycle Details
-
Egg: Tiny, hatch in 1–4 weeks.
-
Larva (mealworm): Molts several times over ~3 months. Newly molted larvae are white and soft before hardening to golden brown.
-
Pupa: White to yellow-brown, non-feeding stage, lasts 1–3 weeks.
-
Beetle: White/light beige at first, then hardens to red, brown, and finally dark brown/black. Lives several months and reproduces before dying.
Supplements for Healthy Mealworms
To make your mealworms fatter and more nutritious, add supplements:
-
Calcium supplement (or finely ground eggshells)
-
Wheat germ, soybean meal, fish flakes, bone meal, brewer’s yeast, graham flour, etc.
Mite Prevention
Sometimes colonies get infested by grain mites (Acarus siro). They appear as tiny, whitish-tan dots and thrive in moist conditions.
-
Always use Exotic Nutrition Mealworm Keeper to reduce risks.
-
Prevent infestation by:
-
Floating bins in water (moat method)
-
Standing bins on legs in water cups
-
Coating bins with Vaseline barriers after cleaning
-
⚠️ If mites appear, discard the entire colony and start over.
__________________________________________________________________________________________________________
Ready to Shop? Shop By Pet or Shop By Category
Want Discounts? Click here to subscribe to email and SMS marketing
Got Questions? Browse more free Blogs or Contact Us with any inquiries regarding our products.
Notice: Exotic Nutrition cannot provide specific care guidelines on an individual basis. Please consult a veterinarian or experienced breeder.
Exotic Nutrition is proud to serve hundreds of universities, zoological parks, veterinarians, research centers, and other institutions seeking to advance the health and well-being of exotics worldwide. See a full list of institutions using our products here.
Exotic Nutrition has a heart for animals in need. Through regular donations to rescues, rehabilitators, and special fundraiser events, Exotic Nutrition is making a significant impact in the lives of animals. See a full list of our charitable donations here.
Comments (7)
Great information. I am starting a mealworm farm to help local backyard chicken farmers.
This is a very comprehensive article that is also easy to understand and simple to implement. The best I’ve seen, many thanks!
Just had bush fires in Dunsborugh thinking of helping the bird carers with a mealworm farm
It doesn’t sound easy ongoing for me
Maybe I master the setting up and hand over to the bird carers
The fish bait is of interest
Thankyou very much very good information for a beginner very clear to understand
Thanks again
Noel wallace
I just started
Leave a Comment